 To correctly render a VR image pair, the app has to know the exact screen size.
Unfortunately, too many phones (even high-end ones) report a value that is not correct or not precise enough.
Therefore, make sure the screen size is correctly set.
To correctly render a VR image pair, the app has to know the exact screen size.
Unfortunately, too many phones (even high-end ones) report a value that is not correct or not precise enough.
Therefore, make sure the screen size is correctly set.
The viewer settings menu allows the user to correct or personalize viewer parameters.
To correctly render a VR image pair, the app has to know the exact screen size.
Unfortunately, too many phones (even high-end ones) report a value that is not correct or not precise enough.
Therefore, make sure the screen size is correctly set.
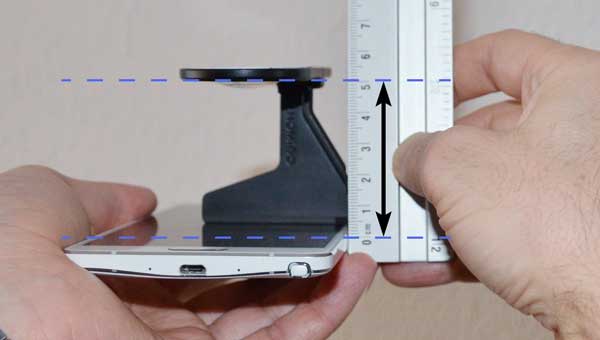
Choose Screen Size from the list.
The calibration screen displays a ruler image and buttons for making changes.
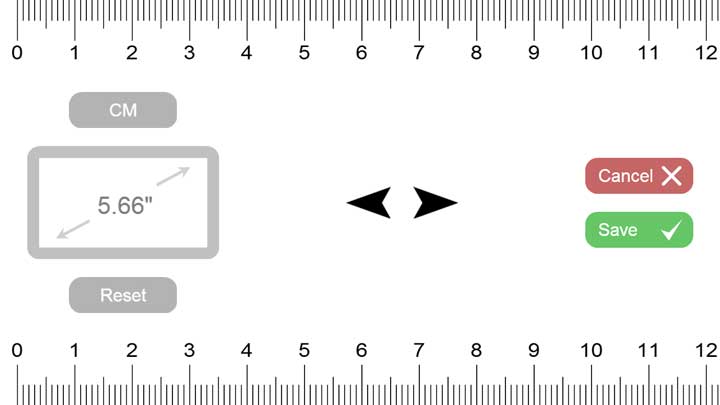
Put a real ruler on the ruler image and change the screen size until the two exactly match. Don't forget to reposition your head such that you compare the rulers exactly from the top. Looking from the side can give wrong results as there is quite some gap between the ruler and the screen image. You can scale the ruler image with your finger or use the arrows.
You can change the ruler format from centimeters 'CM' to inches 'INCH' by pressing once on the 'CM'. Pressing once more changes the format to the 'Credit-card', in case a ruler is difficult to get. 'RESET' will restore the default value.
Choose 'Save' to store the changed size or 'Cancel' to go back without a change.
The app does not have the permission to change screen size at the system level. It will instead adopt all viewer parameters such that other VR apps (based on Google Cardboard) will display a correct view.
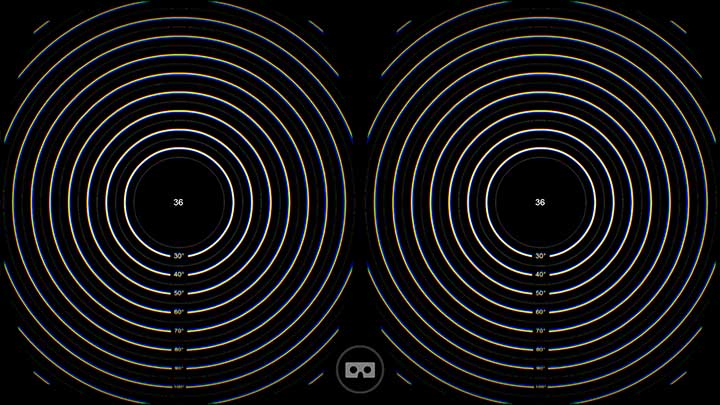
 Choose Lens Separation from the list to set the distance between the lenses of the viewer.
CAUTION: This is not the distance between your eyes!
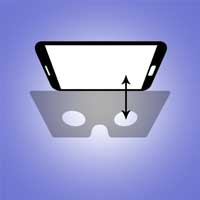
Put your phone into the viewer while making sure the screen is centered in the middle of the viewer. Use the vertical guide lines for precise positioning.
If your viewer has lenses with adjustable IPD (interpupillary distance), adjust this distance first before adjusting the lens separation parameter.
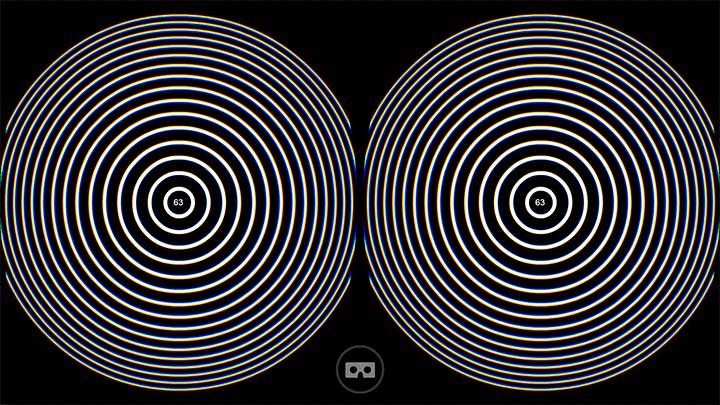
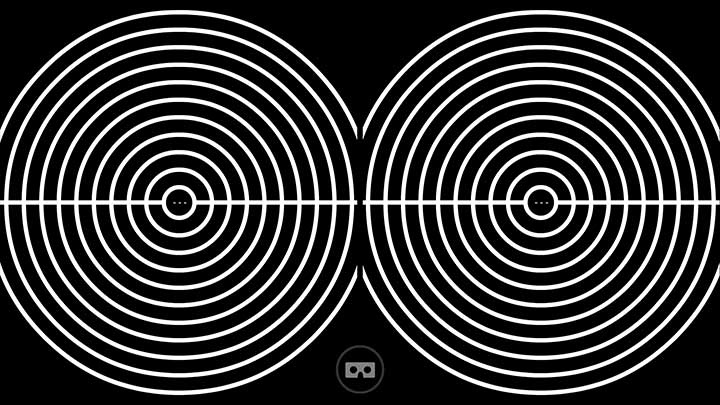
The calibration screen displays concentric circles that should converge into one when adjusted correctly. The lens separation value is printed in millimeters.
Move your head up and down to change the distance between the image pair. Try moving the circles away from each other without putting a strain on your eyes. This is the distance at which you can gaze into the distance with relaxed eyes. When finished, wait for 5 seconds without moving. This will bring you out of the calibration mode. You can also tap the screen to exit. If you want to stop without making a change, look all the way down and wait.
Alternatively, you can measure the lens separation with this simple trick:
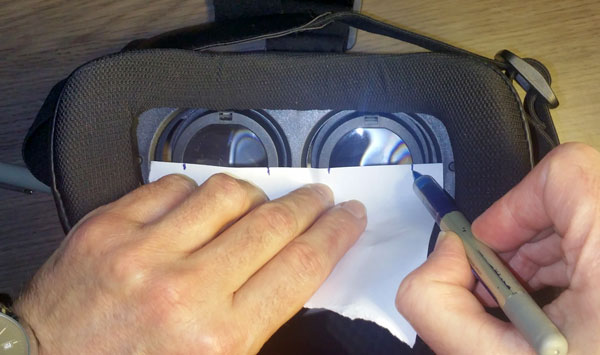
Put a piece of paper in the middle of the lenses and draw dashes at the edges of the lenses as shown above. Then, measure the distance of the dashes at the outside, and the dashes at the inside.
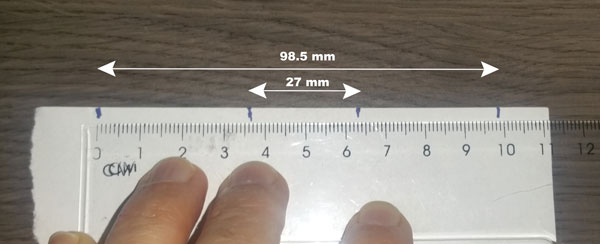
The lens separation is half of the sum of these two lengths: (98.5 + 27) / 2 = 62.75 mm ~= 63 mm.
DISCUSSION: Viewers with adjustable IPD have QR codes with a fixed setting for the lens separation. The only IPD setting that the viewer will work correctly with is this fixed setting! Suppose the QR code is using 60 millimeters as the lens separation parameter... Even if your eyes' IPD is much larger, let's say 70 mm, the only IPD setting that the viewer will work correctly with is still 60 mm! So what is the sense of having a viewer with adjustable IPD? Many people do not realize this! There is a reason why more professional viewers like Samsung's Gear VR or the Google's Daydream Viewer do not have adjustable IPD. OK, with 'Sites in VR' you can actually adjust it to your eyes' IPD... but how many people know this or do it?
 This setting is used to center the display vertically.
Put your phone into the viewer while making sure the screen is centered in the middle of the viewer. Use the vertical guide lines for precise positioning.
The calibration screen displays concentric circles with a horizontal line in the middle. When you move your head up and down you will see that the image moves up and down. Stop at the point where the horizontal line is in the middle of the display while most of the concentric circles are displayed as a whole. Wait for 5 seconds without moving. This will bring you out of the calibration mode. You can also tap the screen to exit. If you want to stop without making a change, look all the way down and wait.
 The Screen to Lens Distance parameter is used by the VR rendering engine to calculate the viewing angle of every pixel on the screen.
The viewing angle has to match the normal vision.
If the eye's viewing angle is wider than what is displayed, everything will go faster when you move your head around.
If the displayed viewing angle is wider, the objects in the middle will move slower than normal and the objects at the lens border will move faster.
All of this will reduce the feeling of immersion and might cause motion sickness.
It would feel as if you are using someone else's prescription glasses.
So it is very important to get this parameter right.
Unfortunately, this is also the most difficult to measure manually.
There are multiple factors that influence this parameter:
The Screen to Lens Distance parameter is used by the VR rendering engine to calculate the viewing angle of every pixel on the screen.
The viewing angle has to match the normal vision.
If the eye's viewing angle is wider than what is displayed, everything will go faster when you move your head around.
If the displayed viewing angle is wider, the objects in the middle will move slower than normal and the objects at the lens border will move faster.
All of this will reduce the feeling of immersion and might cause motion sickness.
It would feel as if you are using someone else's prescription glasses.
So it is very important to get this parameter right.
Unfortunately, this is also the most difficult to measure manually.
There are multiple factors that influence this parameter:
The distance between the screen and the optical center of the lenses,
The thickness of the screen's glass protection,
The eye to lens distance,
The magnification of the lens.
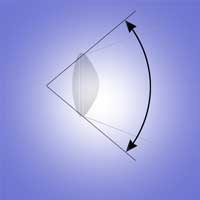
The most important one is the 'screen to lens distance', hence the name of this parameter. The optical center of the lens is above the lower curvature of the lens. See image:
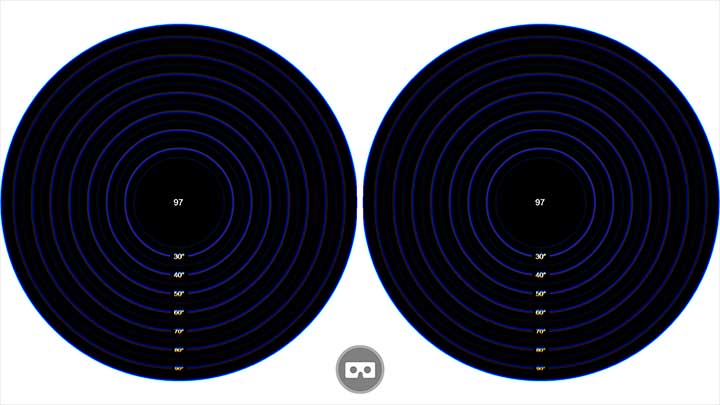
Once you've measured this distance choose Screen to Lens Distance from the list.
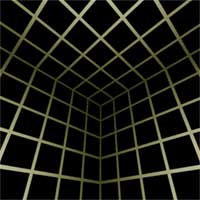
The calibration screen displays field of view as concentric circles with 10 degree separation. Screen to lens distance is shown in millimeters. When you move your head up and down you will see that the distance number increases or decreases. Stop when the number is the same as what you've measured manually and wait for 5 seconds without moving. This will bring you out of the calibration mode. You can also tap the screen to exit. If you want to stop without making a change, look all the way down and wait.
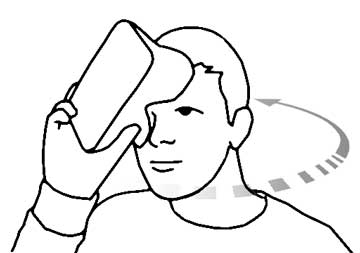
 To test if the setting is correct, choose "Test Room" from the menu.
Then, while exposing one of your eyes to your surroundings, keep the other eye on the screen image.
You have to tilt the headset about 45 degrees pushing one side up, away from one of your eyes.
Depending on the VR headset, this can be easy or hard to do.
To test if the setting is correct, choose "Test Room" from the menu.
Then, while exposing one of your eyes to your surroundings, keep the other eye on the screen image.
You have to tilt the headset about 45 degrees pushing one side up, away from one of your eyes.
Depending on the VR headset, this can be easy or hard to do.
Then align objects in your environment (like the edge of a door) to the lines in the scene. You might need to change your position a bit to achieve this. Then start turning slowly. Watch if the object(s) and the lines stay on top of each other while you turn. (Obviously, you would need a phone with a gyroscope sensor to be able to do this!). If the displayed image is moving faster, go back to the settings and decrease the screen-to-lens distance. If the displayed image was moving slower, increase the screen-to-lens distance. Do this in a few iterations until they move at the same speed when you turn your head.
NOTE: The best way of measuring this parameter is to use a calibrated camera whose nodal point is placed at the same distance as the nodal point of the human eye. Take images of test patterns and then calculate the angular magnification from these images. Obviously, this needs certain level of technical knowledge and expertise. This is what we've done with the viewers that are already on the list. Our Viewer Calibration Reports show that most manufacturers have a problem setting this parameter correctly for the QR code they supply.
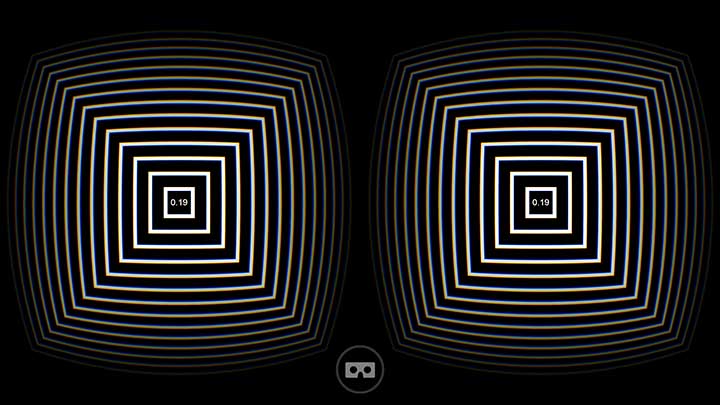
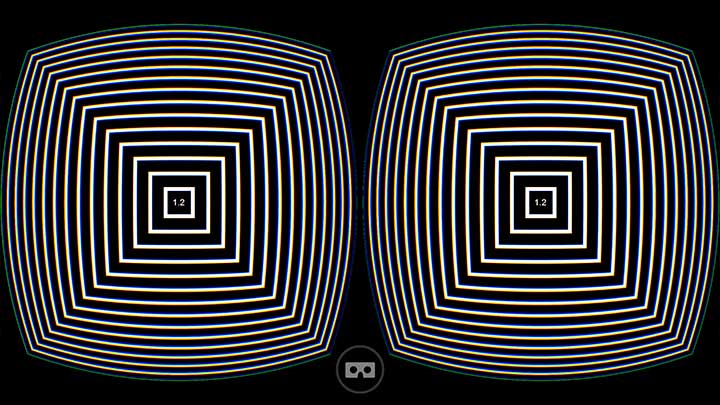
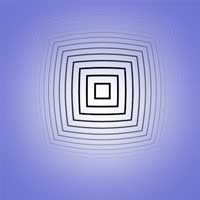 Choose Inner Distortion from the list to reduce the image distortion at the center of the lenses.
The calibration screen displays concentric rectangles. When you move your head up and down you will see that the lines at the center change shape. Stop at the point where the lines are straight and wait for 5 seconds without moving. This will bring you out of the calibration mode. You can also tap the screen to exit. If you want to stop without making a change, look all the way down and wait.
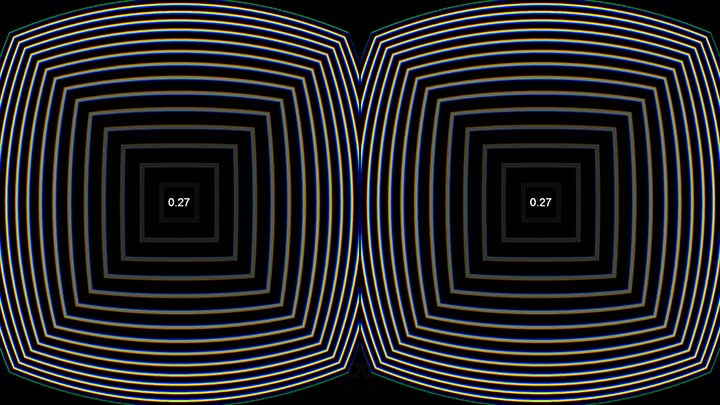
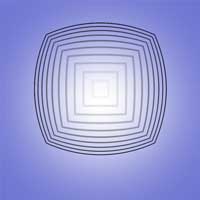 Choose Outer Distortion from the list to reduce the image distortion at the edge of the lenses.
The calibration screen displays concentric rectangles. When you move your head up and down you will see that the lines at the edges change shape. Stop at the point where the lines are straight and wait for 5 seconds without moving. This will bring you out of the calibration mode. You can also tap the screen to exit. If you want to stop without making a change, look all the way down and wait.
 Choose Chromatic Aberration from the list to reduce the color fringes along the edges of contrast rich parts of the image.
The calibration screen displays concentric rectangles with high contrast. When you move your head up and down you will see that the color fringes reduce or increase.
You will see that the color fringes are stronger at the edges of the lenses than at the center. Stop at the point where color fringes are least visible and wait for 5 seconds without moving. This will bring you out of the calibration mode. You can also tap the screen to exit. If you want to stop without making a change, look all the way down and wait.

 Choose Field of View from the list to change the 'Projected' field-of-view.
This is the circular screen area that is used to render a VR image pair.
This setting is mainly used to reduce the render time by not rendering areas that the eyes won't see.
If your device can produce rendered images at a rate of 60 Hz without hiccups, you can skip adjusting this setting.
Choose Field of View from the list to change the 'Projected' field-of-view.
This is the circular screen area that is used to render a VR image pair.
This setting is mainly used to reduce the render time by not rendering areas that the eyes won't see.
If your device can produce rendered images at a rate of 60 Hz without hiccups, you can skip adjusting this setting.
The calibration screen displays an outer circular area in white that changes diameter when you move your head up and down. Try to make this diameter as large as possible. Stop moving when the edge of the white area is not more directly visible. Wait for 5 seconds without moving. This will bring you out of the calibration mode. You can also tap the screen to exit. If you want to stop without making a change, look all the way down and wait.
NOTE: The 'Projected' field-of-view has to be larger than the area that is visible when you only look straight ahead. As the eyes move around, more area becomes visible. E.g. when you look at the left edge of the lens, your eyes will see a few degrees more at the right edge of the lens.